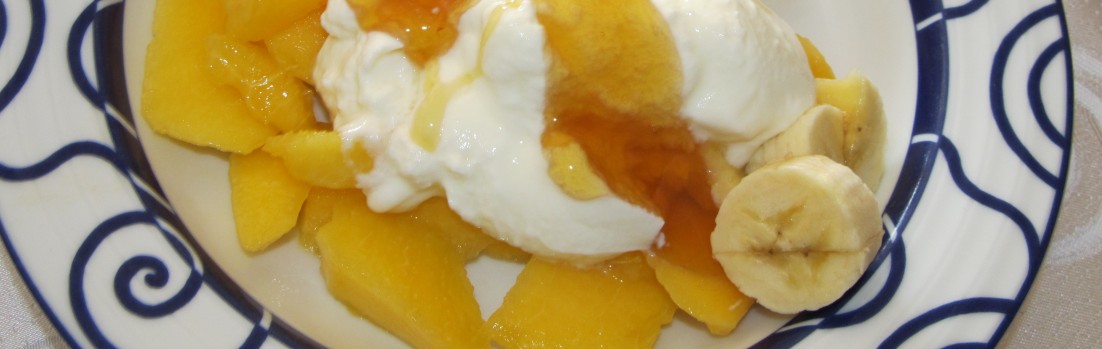
I read one of the blog posts about a handwritten book of family recipes which were all in German. The author of the blog was asking for help translating the recipes. My daughter, in her first year at university, is minoring in German. I sent her the link to the blog and asked if she might be able to help with this woman’s project. Fortunately my daughter is an excellent baker (and a big fan of the British Baking Show) and is also a thoughtful, generous human being.
When we visited Turkey a couple of years ago, one of the meals our two teenagers enjoyed most was a big dish of Manti. According to a wonderful Turkish cookbook I have,
Manti are the ravioli of Anatolia. They are admittedly a little fussy to make, as the dough is to be rolled thinly and cut into fine squares, filled with a smidgeon of meat and sealed into neat little parcels. But the effort is well worth it – they taste delicious with the traditional distinctive yogurt, garlic and herbed butter topping.
For our young Turkish niece and nephew, Manti is one of their favorite comfort foods — it is their macaroni and cheese.
After looking through my lovely Turkish cookbook, my daughter asked if we could try making homemade Manti. We go the ingredients and dove into the process. My daughter and I made the dough, rolled it as thinly as we could then cut it into 1 1/2″ squares. We stuffed each square with meat and pinched the corners shut into the special four corner shaped little packets.
Image by thebittenword via Flickr CC license
Image by thebittenword via Flickr CC license
This took FOREVER! After all that the only thing left to do is boil them for a few minutes until they are cooked through (and float in the boiling water) and cook the simple yogurt sauce that goes on top.
Restaurant worker making tiny manti pasta in Istanbul. The best manti originated in Kayseri and is filled with minced lamb. Image by Phil Norton via Flickr CC license
We came to the conclusion that using meat-filled tortellini would make everything so much easier and that it would taste essentially the same. So that is what I’m suggesting you do, too. Our homemade version was delicious, but we do not think the time and effort involved made a huge difference from buying ready made tortellini (except for the shape, which most Americans won’t know about anyway).
So — buy enough meat-filled tortellini for your family and cook it as directed on the package.
Manti; Image by Sean Munson via Flickr CC license
For the Manti taste, you definitely need the sauce. Here’s how to make it:
Melt 1/4 c. butter (or use extra virgin olive oil) in a skillet.
Add 2 or 3 (or more to taste) cloves of minced garlic (cook briefly), then add 2 t. paprika, 1 t. dried red chili flakes (or use 1/2 t. is you like less spice). The recipe says to add some dried mint (2 t.) but we didn’t have it that way in Turkey so I didn’t add that.
To serve:
Top each serving of hot, freshly cooked meat-filled tortellini (our Manti substitute) with a large dollop of plain Greek yogurt and a generous drizzle of the flavored butter (0r olive oil) mixture. Stir to combine as desired and season with salt and pepper to taste. Top with grated parmesan cheese.
Serve with a salad and warm, crusty bread. YUM!!
You could use cheese tortellini to make this a vegetarian dish. You could also use (meat-filled or cheese-filled) ravioli instead of tortellini if you want bigger bites. You might need to make more sauce if you use ravioli, though.
Ingredients needed:
Enough meat-filled tortellini for your folks and hot boiling salted water in which to cook it
2 c. plain Greek yogurt (full fat is better than non-fat for this dish)
1/2 c. butter or olive oil
several cloves of garlic
paprika
dried red chili flakes
(optional: dried or fresh mint)
parmesan cheese
Making manti, turkish dumplings, as seen in the February 2008 issue of Martha Stewart Living. Each dumpling is filled with lamb, onion and parsley. They are served with a yogurt sauce and melted butter.
RECIPE REVIEW
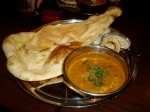
Penzeys Recipe: Curried Chicken with Basmati Rice pilaf
In a food processor or blender combine and purée:
1 large onion, cut into eighths
3 cloves of fresh garlic
1 piece of fresh ginger root about 1″, peeled (or use 3/4 t. powdered ginger)
2 jalapeño peppers, quartered and seeded
Image by Jutta M. Jenning via Flickr CC license.
Image by Dubravko Soric via Flickr CC license
Image by Daniel R Blume via Flickr CC license
Image by Q family via Flickr CC license
In a large skillet:
Heat extra virgin olive oil (3 to 4 Tablespoons).
Brown 10 – 12 boneless skinless chicken thighs for about 4 min per side until browned.
Remove the chicken to a platter.
Add a little more oil if needed.
Add 1/2 t. whole cumin seeds and stir til they sizzle (1 min. or so).
Add the purée to the skillet along with
2 T. sweet curry powder
1/4 t. cayenne
1 t. salt
Cook all this for 5 to 10 minutes until it is golden and fragrant.
Add the chicken back to the skillet and stir to cover well with the curry.
Add 1 1/2 to 2 c. water or chicken broth.
Bring to a gentle boil. Lower heat, cover, and simmer for 30 min or so.
While the chicken curry is simmering it is time to make the rice.
Image by Laura Turner via Flickr CC license.
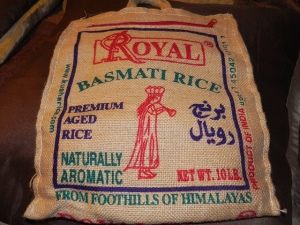
Basmati Rice Pilaf:
2 c. basmati rice
3 1/2 to 4 c. water or broth
1/2 t. sweet curry powder
1 t. salt
Heat water or broth to boiling. Rinse rice. Add rice and curry powder to boiling water. Return to a boil, lower heat to simmer, cover tightly and set the timer for 13 or 14 minutes. Check toward the end to be sure the rice doesn’t stick to the bottom of the pan. Fluff. Top with any or all of the optional stir ins below.
optional stir ins about 1/4 c. each:
sliced green onion
thawed frozen green peas
chopped fresh cilantro leaves
This recipe might look complicated but it is essentially just a few steps. The onion/garlic/ginger/jalapeño mixture is a breeze, then the chicken simmers in the sauce. While that cooks, then you are taking care of the rice.
My family really enjoys this curry! It is very tasty; nicely spiced but not overpowering. You can serve the chicken with plain rice if you want to simplify it, though.
I found this fabulous book for only $5.99. List price is $14.95 even on their website currently so I’m not quite sure how I got it for this very nice price.
This is technically a cookbook, but as the blurb on the front says “More than a cookbook, it is a humor book and a self-help book and a security blanket and a kind of a Bible.” (quote from Elizabeth Berg, NPR interview)
Beat This! book cover
The book is called Beat This!
(written by Ann Hodgman with a foreword by Elizabeth Berg)
Now you may be wondering — Why, dear Tromp Queen, is this blog worthy? Most of you already know that I own plenty of cookbooks (read about it here in Confessions of a Chronic Creative Collector). I love to look through them for new recipes and read about different cooking techniques and cultures. Really. I do. And I really can’t help looking at cookbooks on the sale tables. Really. I can’t.
The blurb on the front enticed me. I grabbed the book. Then I wandered around until I found the cozy couch area so I could sit in comfort to take a peek inside the book.
I instantly fell in love with the author’s humor. The chatty (sometimes snarky) asides sprinkled throughout the book caught my interest:
detail aside from Beat This! Cookbook by Ann Hodgman
detail aside from Beat This! Cookbook by Ann Hodgman
detail aside from Beat This! Cookbook by Ann Hodgman
detail aside from Beat This! Cookbook by Ann Hodgman
detail aside from Beat This! Cookbook by Ann Hodgman
detail aside from Beat This! Cookbook by Ann Hodgman
detail aside from Beat This! Cookbook by Ann Hodgman
detail aside from Beat This! Cookbook by Ann Hodgman
I love her recipe names! Descriptive and humorous
There are recipes for “A Really Great Stuffing with Sausage In It,” “Vaguely Thai-Like Beef Salad,” “Magnificent Ultra-Turkey,” and “Powerfully Better Than Any Other Pot Roast.” The first sentence of that last recipe reads like this: “A well-made pot roast is one of those noble, time-honored dishes that — oh, sorry, I forgot I wasn’t writing the lyrical kind of cookbook.”
I haven’t made anything from this cookbook yet, but I’ve gotten enjoyment out of it already. I have high expectations that when I DO make something out of this book; it is going to be fabulous.
*I did make the apple crisp recipe and it was very delicious! We ate it all in one go.*
This little story in the foreword sealed the deal for me: (Yes, I did read the foreword!)
My next door neighbors did something nice for me and so I did something nice for them, which is to say I made them Ann’s Very Controversial Apple Crisp (page 23). The next day, the wife told me, “You know my husband never eats desserts, doesn’t like them. He could not stop eating that apple crisp.” Another friend told me that when she first made it, she and her husband stood at the stove after it came out of the oven and ate the whole dang thing.
(She’d halved the recipe, but still.)
–from the foreword, written by Elizabeth Berg
So, if you are looking for a gift for yourself or for a friend, or you just have chronic cookbook collector syndrome — I highly recommend this book!
Note: This post was previously published on my “regular” blog: The Tromp Queen. I thought it might be good to repost it here in case some of you don’t follow there.
vintage sign, image by The Tromp Queen CC license 4.0
I decided to change the name of The Heat is ON! to
The Tromp Queen COOKS!
In celebration of this change, I’m presenting several “old” recipe posts from my original “The Tromp Queen” in blog new posts here on The Tromp Queen COOKS! These are some of my very favorite recipes and I feel they deserve more visibility than they currently have (which is buried in a post entrancingly called “Recipe Re-visit”).
I hope you enjoy reading through these recipes and that you will try one or more of them. Please let me know what you think!
I tried to go back through to be sure all the old links will still work, etc. Please let me know if you come across any glitches with the new domain name.
You can have a taste of Turkey without ever leaving your home town!
In honor of our relatives from Turkey who are visiting us right now, I’m posting another of my favorite things to make and eat: Spinach Börek, a Turkish recipe.
Turkish borek made with spinach, feta and goat cheese.
This recipe came to me from my sister-in-law, Çağla. This is one of my teenaged son’s very favorite things to eat. He often requests it for his birthday or for other special meals.
Ingredients:
1 pkg. filo dough, thawed
Fresh spinach, about 10 oz. — I use the pre-washed organic baby spinach that comes in 10 oz. boxes. If you use fresh, wash it thoroughly and remove the large stems. Tear it into smaller pieces. I have used Swiss Chard with good success, too.
8 oz. feta cheese – I buy the chunk kind. It is less expensive and tastes better.
5 to 8 oz. goat cheese – If you have never eaten goat cheese, please DO try it!
3 or 4 green onions, thinly sliced (or any onion, finely chopped, to taste)
½ t. salt or to taste
¼ t. black pepper or to taste
Brushing liquid: Combine these ingredients, mix/whisk/stir together. Have a brush handy for later
3 eggs, beaten
2 to 3 T. olive oil
¼ c. milk
Options:
Cagla says you can use cream cheese, cottage cheese or mozzarella. I never have.
I sprinkle on some Penzey’s Turkish seasoning and/or some dill.
Procedure:
Heat oven to 350. Spray two cookie sheets w/ Pam or use parchment paper.
Clear a large work area. I cover my space w/ waxed paper, using about 4 or 5 long strips placed side by side and overlapped slightly. Most filo packages have two smaller individually wrapped packages inside them. Open one of these packages. Divide the filo into four roughly equal stacks, with about 6 or so sheets in each stack. Use it all. I lay the four stacks on the waxed paper with the one short end of the dough near me and the long side perpendicular to me. Brush each filo dough stack w/ the egg/olive oil/milk mixture. Cover the surface but don’t go crazy. Work kind of quickly because this dough dries out quickly. Open the other little package of dough and divide into four stacks again, placing each one on one of the egg soaked stacks. I push down on each stack to kind of fuse the layers together a bit. You can brush more of the egg mixture on the top if you wish. I don’t always do that, though, if I’m in a rush. So you should have a stack of 6 sheets of dough, egg mixture layer, and six more sheets of dough. You should have four of these. This is your foundation for the next step.
Fresh Spinach (Photo credit: artizone)
Filling:
Divide the spinach into four roughly equal parts and cover each filo stack with one part of the spinach. Try to keep the spinach within the edges of the dough, but this is usually a hopeless task. Do the same with the onion, the feta, the goat cheese and the salt and pepper. Sprinkle and crumble away. Add any other seasonings you think need to be in there (dill? Turkish seasoning? It is up to you).
Rolling:
Starting at the shorter end of one stack, begin to roll it up (like a jelly roll, a quilt that has been quilted or an enchilada) brushing the filo dough that appears from the bottom with the egg mixture as you go. Don’t forget to brush it as you, or your rolls will be very dry and not crispy at all. Don’t ask me how I know this. You will end up with a cylindrical roll that hopefully has the spinach and cheese all enclosed inside it. Mine are usually kind of fat. 🙂 You can squish the spinach quite a bit since it cooks down.
Baking:
Carefully move each roll to the cookie sheets you prepared earlier. If you didn’t do that, either ask for help or go wash your hands since you are covered in goat cheese and other stuff. Bake the rolls at 350 for about 40 minutes until they are golden brown and crispy.
Serving:
We usually cut each roll into 2, 3 or 4 pieces depending on what else we are having with it. You can eat it hot, room temp or even cold (though I never have eaten it cold).
Gözleme, Turkish specialty, Applying the stuffing (in this case: sheep cheese, spinach, and herbs) (Photo credit: Wikipedia)
The photo above shows a similar Turkish food. The dough is different and the dish is also cooked differently. The filling of the spinach borek are very much the same, though, as the fillings shown in the photo.
I saw this recipe posted on a friend’s wall. I shared it with my husband because it looked like a pretty easy recipe that he and our daughter would like. I am not a big fan of smoked sausage (the kind that comes in a tight plastic wrapped ring), so I would be happy if they ate it sometime when I wasn’t home.
Well, one night this week — we were all home. We happened to have the ingredients to make this recipe so I gave it a try. Here is the recipe:
Oven Roasted Smoked Sausage and Potatoes
1 package of smoked sausage, sliced into rounds 1 large onion, peeled and chopped 6 or more large potatoes, peeled and chopped into 1/2 inch cubes olive oil sea salt or kosher salt freshly ground black pepper smoked paprika (or any kind of paprika — I used Spanish Smoked Paprika from Penzeys) dried thyme (or any blend of herbs that includes thyme — I used Bouquet Garni from Penzeys) 1 cup of good quality grated sharp cheddar cheese
Preheat the oven to 425 degrees. Line a large baking tray (with sides) with several sheets of foil, and drizzle with a bit of olive oil. Spread the oil out over the pan. Set aside.
Put the sausage rounds, onions and potatoes onto the foil-lined baking sheet. Drizzle with a couple tablespoons of olive oil and season to taste with salt, pepper, paprika and dried thyme (or other herbs). Toss together with a wooden spoon (or your hands) until everything is evenly distributed.
Place into the heated oven and roast for 45 minutes to 55 minutes, stirring every 15 minutes or so, until the potatoes are golden brown and tender. Turn off the oven. Scatter the cheese over top of the cooked meat and potatoes, Pop back into the oven a few minutes to melt the cheese. Serve immediately.
We had a bag of baby spinach leaves, some fresh parmesan cheese and some kalamata olives so I made a quick little Greek-Ceasar salad to fill out the meal.
Our daughter made pumpkin bread (using a Trader Joe’s mix) for dessert.
It was a not too time consuming, delicious, and fairly reasonable clean up.
Every liked it. Even me.
Overall: FIVE forks!
This recipe is adapted from one published by The 205 Tavern of Church Point, LA on their Facebook page. If I ever get to Louisiana, I would love to look up this place and have a bite to eat there. It looks like they specialize in Cajun food and it all look delicious!
I am fortunate to live near a Half-Price Books bookstore. I love books, stationery, music, cards, CDS and LPs — you name it — this store seems to have it.
I tend to browse the cookbooks at this store, even though I already have a HUGE collection of cookbooks at home. (I also have a really good Goodwill store nearby, too. Hardback books, including cookbooks, are only $1.79.)
I have a combination of three part-time jobs right now, so cooking dinner has become a somewhat rarer activity than it was previously.
I decided to try this recipe because you can only eat out so many times in a week before you get tired of
food that involves deep-frying
food that involves a drive through
food that begins to all taste the same
food that has no vegetables in it
Ingredients: *I tweaked a few ingredients and amounts so this isn’t exactly like the recipe in the book
1 pound of spaghetti noodles (or Chinese egg noodles if you can find them) 2 T. toasted sesame oil
1 whole roasted deli chicken
1 cucumber peeled, quartered, seeded, sliced and diced 4 scallions, sliced (white and green parts) 1/3 dry-roasted salted peanuts cilantro, chopped
1 clove garlic 1 one-inch piece of fresh ginger, peeeled (I grated mine) 1/2 cup smooth peanut butter 1/4 cup soy sauce or tamari 2 T brown sugar 1 T rice vinegar 1/2 t crushed red pepper flakes 1/4 c hot water (I used the pasta water as it was cooking)
Cook the pasta in boiling, salted water. Drain and toss with sesame oil
While the pasta is cooking, prepare the garnishes and sauce.
Also de-bone the deli roasted whole chicken. Cut the meat off the bones; save the “runnin’ gears”– the bones, skin and carcass — to make some quick chicken stock for future use. Keep the meat warm until the pasta is ready.
Garnishes: 1 cucumber peeled, quartered, seeded, sliced and diced 4 scallions, sliced (white and green parts) 1/3 dry-roasted salted peanuts cilantro, chopped
Mix the ingredients (listed below) in a blender and blend thoroughly. Toss this mixture with the pasta. 1 clove garlic 1 one-inch piece of fresh ginger, peeeled (I grated mine) 1/2 cup smooth peanut butter 1/4 cup soy sauce or tamari 2 T brown sugar 1 T rice vinegar 1/2 t crushed red pepper flakes 1/4 c hot water (I used the pasta water as it was cooking)
Cook the pasta in boiling, salted water until al dente. Drain. Put it in a large bowl and toss it with the 2 T of sesame oil.
While the pasta is cooking, combine the ingredients for the sauce in a blender. Blend. Add this mix to the sesame oiled pasta.
Also while the pasta cooks, de-bone the deli roasted whole chicken. Prepare the garnishes.
To serve: Put pasta on a plate. Top with desired amount of chicken plus generous garnishes of cilantro, peanuts, scallions, and cucumber.
Image by Madeleine via Flickr CC license This image is not the actual recipe I’m posting. It looks very similar to this, though.
REVIEW: This recipe was quick to fix. It has very good flavor and was delicious. I happened to have nearly all the sauce ingredients on hand, so it was not a huge amount of items to buy at the grocery store — basically just a deli chicken, a cucumber and maybe some spaghetti, cilantro and scallions if you happen to have none of those things at the moment. I liked the fact that it tasted a little Thai and a little Chinese — but that it wasn’t overly spiced in either direction. You could definitely bump up the crushed red pepper if you need more heat or add Siracha sauce at the table.
This could easily be made vegetarian if you leave out the chicken. You could add tofu.
I think it would be good with grilled shrimp instead of the chicken. If you have them, fresh bean sprouts would give a nice crunch as well. You could use honey instead of brown sugar in the sauce. I grated my ginger into the blender because I didn’t want to chomp down on an unblended chunk of ginger. I would add more garlic next time, too.
It would be nice to add some toasted sesame seeds. I didn’t have time or energy for that, but it would be good.
FULL FORKS for this one! FIVE FORKS! Go fo it! Please let me know if you try this recipe and how you like it.
This Rachael Ray recipe for basic Carbonara is quick and easy.
I’ve made just a couple of tweaks, but it is still pretty much her original recipe (which you can see HERE.)
About 3 tablespoons olive oil
1/3 pound pancetta or bacon, small dice
5 to 6 cloves garlic, chopped
1/2 cup dry white wine (could use stock if you don’t have wine handy)
3 large egg yolks, separated. Get rid of the egg whites in another recipe — you don’t need them for this.
Salt and pepper
1 pound pasta such as linguine, spaghetti or egg tagliatelle. I like the wider pasta for this recipe.
Grated Pecorino Romano and/or Parmigiano-Reggiano
1/2 cup flat-leaf parsley, finely chopped
PREPARATION
Bring a large pot of salted water to boil for pasta.
Heat olive oil, 3 turns of the pan, in a large, deep skillet over medium heat. Add pancetta or bacon, brown 3-4 minutes, then add garlic and some black pepper, and stir 2 minutes more. Add wine and reduce heat to low. Whisk up egg yolks and season with salt and pepper.
Add pasta to salted boiling water and cook to al dente.
Add 1 full cup of starchy cooking water to egg yolks in a slow stream to temper them. Reserve an extra half-cup starchy water in case the pasta gets too tight when you toss it. Drain pasta and add to pancetta and garlic, remove from heat and toss with egg yolks and handfuls of grated cheeses, parsley, adjust salt and pepper to taste.
That’s it. If you are the kind of person who always has bacon and parsley on hand, you could make this and be eating it in less than 1/2 hour.
Review:
Be careful when browning the bacon or pancetta. It can easily burn since you are frying such small pieces. Likewise, watch the garlic carefully when you add it. With the already hot bacon grease, the garlic needs much less time than usual to get overly browned.
I didn’t read the recipe carefully enough at first and nearly whisked up the egg whites, too. That would not work out very well, so don’t do that! Also, DO take out the pasta water and keep out at least as much as she recommends. Mine got pretty thick so I added a splash of milk, which may or may not be the Italian way. I have no idea. It worked in a pinch. Have everything ready for the end — the cheese and the parsley. It comes together in a flash. Also — DO use the fresh flat-leave parsley if you can. It really adds a nice fresh flavor.
Follow the steps for tempering the egg yolks carefully. You don’t want the eggs to cook too soon. They melt into the sauce and thicken it with the cheese.
The down side of this recipe is all the grease. You don’t drain the bacon grease and that PLUS the olive oil adds up to quite a bit.
I suppose you could experiment with draining most of the bacon grease (maybe leave 1 T or so) and then add more water or cheese or something at the end.
I think a little lemon flavor and maybe some green onions would be nice in this.
It might also benefit from a dash of crushed red pepper flakes.
I might try some more variations in the future. I will let you know when I do!
Overall:
FOUR out of FIVE FORKS!
Really quick and easy, but a little overboard on the oil/grease in my opinion.
Even my very picky nearly 16-year-old daughter ate it (after picking around all the “green stuff”).
Enjoy! And, as always, please let me know if you try this recipe, how it turns out for you, and how you like it!
image via Flickr CC by cookbookman17; Fresh Parsley — A bunch of fresh hand picked parsley. This parsley is bursting with flavor and ready for use.
The best Falafel sandwich I have ever had was near the British Museum in London. There was a little sandwich shop just around the corner from the main entrance. The falafel was declicious, but the “fixins” were wonderfully fresh, crisp and flavourful. (Spelled it the British way for good measure, there!)
I looked at Google maps in that area around the British Museum and the best possibilities are Salt and Pepper (5 Bloomsbury Street, London WC1B 3QE, England) or Bimbimbab Cafe (37 Museum Street, London WC1A 1LP, England). The menu and reviews at Salt and Pepper remind me more of the cafe, but the photo of Bimbimbab’s interior also looks familiar. It was not a Korean restaurant at the time if that is indeed the place we had falafel. It was 2008, so it is not likely I can solve this mystery now (unless someone in London can shed light on my memory!)
I’ve looked for a good recipe to try to recreate this memorable sandwich. The closest so far is a recipe from Rachael Ray.
My daughter and I made Rachael Ray’s Falafel Burgers recipe for dinner tonight.
We tweaked the recipe a bit so I thought I’d share our results and thoughts here.
Salt and freshly ground black pepper, to taste. We used about 1 t. salt and 1/2 t. black pepper.
Extra Virgin Olive Oil for frying.
Combine these ingredients (above) in a large food processor. You might need to do 1 can of chickpeas and 1/2 the other ingredients at a time, then blend it all together in a bowl. We found the full amount to be too much for my Cuisinart. If the mixture seems too dry to hold together, add a little more olive oil. If it seems too wet — don’t even add the olive oil and/or add more flour.
Divide the chickpea mixture into 8 parts. Form into patties. Dredge lightly in flour.
Heat plenty of extra virgin olive oil in a large skillet. You need 1/4 c. or so of oil or sometimes more depending on how large your skillet is.
Fry the falafel patties about 3-4 min. on each side or until lightly browned and heated through. You can use more oil and completely deep fry them, but I think pan frying tastes good and uses so much less oil
To make the sauce combine the following in a small bowl:
1/4 cup tahini paste
2 tablespoons water (or more if needed)
Juice and zest of 1 lemon
Prepare the “fixins” for serving:
4 sandwich-size whole wheat pita pockets (cut in half, warm in oven or toast lightly)
1-1 1/2 cups romaine lettuce, shredded
1/2 English (seedless) cucumber; peel, de-seed, quarter, slice and dice
chopped fresh flat-leaf parsley; a large handful
2 vine-ripe tomatoes, sliced or garden fresh cherry tomatoes (cut into halves or fourths)
(In the street falafel photo below, I see he is offering radishes, jalapeno slices and lemon wedges, and possibly baby spinach, too. It is difficult to see — but I think the idea is toppings galore and whatever you crave!)
To serve:
Fill 1/2 a warmed pita with fixins, sauce and falafel. Have plenty of napkins ready. Sometimes I end up eating it with a fork.
image by Daniel Roy, via Flickr CC; falafel stand in Aleppo, Syria.
REVIEW:
I’ve made this recipe several times. The biggest issue is getting the consistency right so the falafel doesn’t fall apart in the skillet.
The fixings are important. Use fresh and local if possible; organic always tastes better to me, too. Maybe that is just in my head, though.
The original recipe calls for twice as many spices and several quite expensive ones. I have used 1/2 the amounts in the RR recipe and it was good. This is the first time we used the Sweet Curry instead of all the cumin, coriander and turmeric. Feel free, of course, to adjust the spice levels to your taste.
OVERALL: FIVE OUT OF FIVE FORKS!!
Highly recommended.
Please let me know if you try this recipe, how it turned out, and if you enjoyed it.