XL Beef Enchilada image by Cris via Flickr CC license.
I don’t remember where I got this recipe. As with most of the recipes I use, I’ve tweaked it a bit. My son (now 20) will request these every once in a while. It is probably because they are HUGE and have plenty of cheese. He has lived in Wisconsin since just before his first birthday so he is a native Cheesehead.
Beef and Rice Enchiladas
1 pkg. 6.8oz Spanish rice and vermicelli mix (such as Rice-a-roni)
1 lb. ground beef (or pinto beans)
20 oz. enchilada sauce (large can – I’ve used red or green)
10 large tortillas, warmed (could use corn)
4 c. sharp cheddar cheese, shredded (can use less)
Sliced black olives, cilantro, sliced green onions – garnish as desired
Prepare the rice mix according to package directions (The brand I use calls for a 14oz can of diced tomatoes). Brown the beef in a skillet and drain. Combine the beef with the cooked rice mix; add 1 ¼ c. enchilada sauce to this mixture. Save the rest of the sauce for later.
Into each tortilla put:
½ to 2/3 c. rice/beef mix
¼ to 1/3 c. shredded cheese
(and anything else you want to add in there)
Put a little of the enchilada sauce in the bottom of a 13x9x2 baking dish. Place the filled tortillas in the dish. Pour the rest of the sauce over the enchiladas and top with the remaining cheese. Bake uncovered at 350 degrees for 20-30 minutes.
Makes at least 10 large enchiladas.
We usually eat these with refried beans, sour cream and sometimes guacamole and tortilla chips.
Enjoy!
Image of Wisconsin Cheese by Shihmei Barger via Flickr CC license
I have a couple more favorite chili recipes, believe it or not. Here is one that I created by combining several of my favorite recipes and adding some of my own flair, too.
Ingredients:
1.5 ground beef (85% lean)
1 onion, diced
3 cloves of garlic (run through garlic press or use the kind in a jar)
3 T. Penzeys Chili 3000
1 T. Penzeys Medium Hot Chili Powder
1/2 t. cumin
1 t. salt
1/2 t. sugar
25 grinds black pepper
1 large can (28 oz) whole tomatoes, drain and chop
1 small can (6 oz) tomato paste
2 cans (14 oz) dark red kidney beans, drain and rinse
2 c. water
4 c. tomato juice
Brown the ground beef; drain. You can add the garlic and onion while you brown the beef or add it after you brown it; if after, cook a few minutes more. Add the rest of the ingredients bring to a boil, then lower to a simmer. Cook, covered, at a simmer for an hour if you can. Less will be okay, but it will taste better if you cook it longer.
This makes a pretty large batch and is soupier than some of the other chili recipes I make.
Heat the olive oil in 3 to 4 quart pan. Saute the onion until it softens and turns translucent. Toss in the garlic and saute for another minute or so, watching carefully so the garlic doesn’t burn. Add the salt, the petite diced tomatoes, tomato sauce and the rest of the herbs and spices. Heat to boiling, then lower the heat to simmer. Add in the artichoke hearts and olives. Cook the cheese tortellini (or any kind of pasta) according to package directions. Simmer the sauce until the pasta or cheese tortellini is ready. Serve topped with parmesan cheese. VERY GOOD!
Artichoke Hearts, marinated and quartered
I revised this recipe from “Herbed Artichoke Cheese Tortellini” that I found on Taste of Home’s recipe web site. I like the fact that it is made with mostly canned ingredients which is great when you live in Wisconsin and winter lasts about 9 months a year. Using the fresh parsley along with the canned artichokes and olives adds enough brightness to the flavor to make the effort of minimal effort of making the sauce well worth it.
Cheese Tortellini; Image by Laurent, via Flickr CC License. Tortellini aux chèvre et capres.
The sauce tastes great on cheese tortellini, but it also tastes great on any kind of pasta.
If you are really in a great hurry, I suppose you could use onion powder and garlic powder (or some sort of pre-chopped garlic in a jar) to speed the process even more. But seriously, this sauce is very quick to make even with chopping an onion and a couple cloves of garlic.
I hope you try this and please let me know how much you like it!
image via Flickr CC by cookbookman17; Fresh Parsley — A bunch of fresh hand picked parsley. This parsley is bursting with flavor and ready for use.
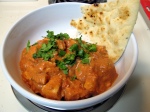
Chicken Tikka Masala; image by Stephen Rees via Flickr CC license.
One of my favorite Indian dishes is Chicken Tikka Masala. Well, that and Sag Paneer and Samosas and a lot of other Indian foods. But I digress. The other night I planned to make Chicken Tikka Masala for dinner using a crock pot recipe. Usually the problem I have with crock pot recipes is that I never seem to have time to actually put the stuff in the crock pot in the morning before I go to work. So that is kind of a fatal flaw in the whole plan to use a crock pot recipe.
When I got around to making dinner the only option was to make it on the stove top.
I realized I did not have one of the critical ingredients: Garam Masala. I DID have an empty jar of it from Penzeys so I read the list of ingredients on the label then gathered as many of those spices as I could from my spice cupboard (or should I say spice “hoard” — I have a LOT of spices). I looked online for recipes that could be made without Garam Masala and found a couple I thought sounded good. I used those two recipes as a guide, combining them and added a few things of my own. The result was DELICIOUS; maybe the best Indian dish I’ve made at home ever.
Chicken Tikka Masala; image by James via Flickr CC license.
Here is what I made:
Order of operations: Marinate the chicken, start the sauce, start the rice, cook the chicken, finish the sauce, combine chicken with sauce (add cilantro and cream if desired), serve with rice (and raita and naan if available).
Marinade:
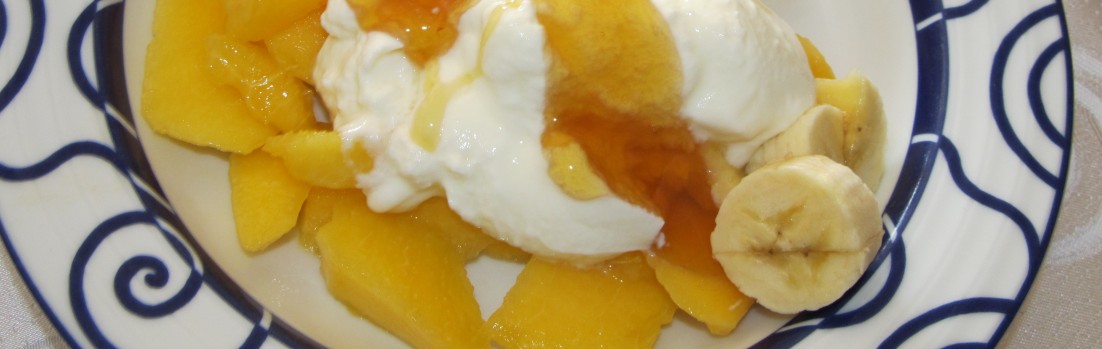
1/2 to 3/4 cup plain Greek yogurt
1 tablespoon lemon juice
1 teaspoon ground cumin
1/2 teaspoon ground cinnamon
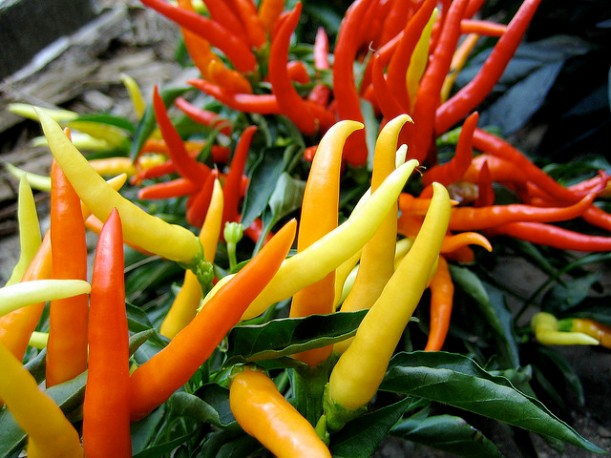
1/2 teaspoons cayenne pepper
½ t. cardamom
¼ t. cloves
¼ t. nutmeg
½ to 1 teaspoons freshly ground black pepper
1 tablespoon grated fresh ginger
1 teaspoons salt, or to taste
3 boneless skinless chicken breasts, cut into bite-size pieces
Combine all the marinade ingredients and mix well. You could use Garam Masala in place of some of the spices or just add 1 or 2 t. to the marinade with all the other spices. Add the chicken pieces. Let the chicken marinate in the yogurt sauce as long as you have time (mine only marinated for about 15 minutes).
Chicken Tikka Masala yogurt and spice marinade; image by JaBB via Flickr CC license.
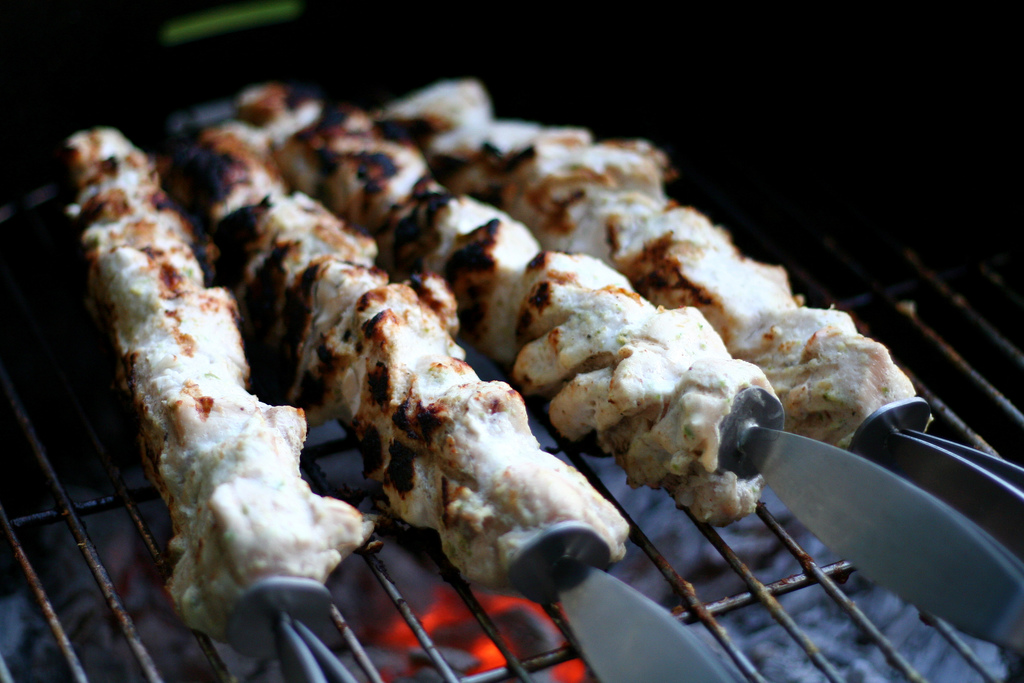
Either grill the chicken on skewers (which is the better way and makes a more yummy tasting final product) or brown it in small batches in a hot skillet with a little EVOO and butter til nicely browned (which is what I did because it was raining and I didn’t want to run in and out to the grill in the rain).
Grilling the chicken for Chicken Tikka Masala; image by Drew McClellan via Flickr CC license.
Sauce:
1 T. butter and 1 T. olive oil
1 large onion, minced
2 to 3 cloves garlic, minced
¼ t. cayenne pepper
1 t. ground cumin
1 t. paprika
½ t. salt, or to taste
1 (14 ounce) can petite diced tomatoes, drained
1 (8 ounce) can tomato sauce
Heat the EVOO and butter in a 3 qt. or larger pan. Saute the onion until it softens. Add the spices and salt and cook about 5 minutes more. Drain the petite diced tomatoes; add the tomatoes to the pan with the can of tomato sauce. Continue to simmer the mixture while you are cooking the chicken (either on the stove or on a grill). Just before you are ready to add the chicken to the sauce, use an immersion blender to puree the sauce and make it somewhat smoother. (You can skip this step, but your sauce will be lumpier).
Add the grilled/browned chicken to the sauce. Heat through and/or simmer for 5-10 minutes or until the rice is ready. Then add the final ingredients below:
½ c. half and half (optional)
1/4 cup chopped fresh cilantro
Chicken Tikka Masala; image by July Frost via Flickr CC license.
Rice:
I cook my rice on the stovetop. Heat 3 c. of water or broth (you can add 1/2 t. sweet curry or a few strands of saffron) and 1/2 t. salt or so to boiling. Add 1 1/2 c. of basmati rice (can rinse it first, but I don’t always do that). Stir. Turn the heat down so it will still be simmering, cover tightly and set the timer for 13 or 14 minutes.
Serve the Chicken Tikka Masala over hot basmati rice with warm naan bread (Trader Joe’s has frozen naan that is very good) and cool smooth tangy raita.
Raita; image by Jules via Flickr CC license.
Chicken Tikka Masala; image by Guy Dickinson via Flickr CC license.
Middle Eastern Chicken Kebabs from Once Upon a Chef
Basically the chicken recipe involves marinating the chopped up chicken thighs in Greek yogurt plus gobs of spices: paprika, cumin, cinnamon, crushed red pepper, black pepper, lemon juice, garlic, etc. After marinating, the chicken is threaded on kebabs and grilled. Voila! That is it. The hardest part is finding all the spices (in my messy spice cupboard) and remembering to marinate the chicken. The chef recommends marinating for several hours or overnight, but I usually manage it for about 30 minutes to an hour.
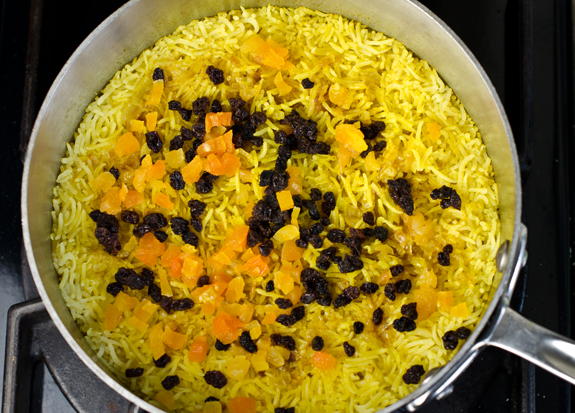
Basmati Rice Pilaf from Once Upon a Chef
For the rice pilaf, the onion is browned in butter and then the spices (turmeric, cumin, cinnamon, garlic) and basmatic rice are added to the skillet. After all those ingredients get acquainted in the hot butter, the liquid goes in. After it simmers for a while, the almonds and raisins get tossed on top before serving.
REVIEW: FIVE FORKS!
Both recipes are EXCELLENT. Yes, there are a lot of ingredients, but once you get organized it is not difficult.
I love the flavor and the healthy eating factor.
Tweaks:
I used chicken broth instead of water in the pilaf. I also added 1/2 cup more rice and about 1 1/2 cups more water. I cook rice in a 1:2 ratio of rice to water usually so I added the extra broth/water to be sure the rice would be moist and cooked through. One could use brown rice. A little saffron would be nice, too.
As I mentioned, I couldn’t find all the spices in my cupboard. I couldn’t find the paprika nor the turmeric. They seem to like to hide. I substituted sweet curry powder one time and Maharaja another time. I think I also used tandoori spice in a pinch. Basically anything that has turmeric in it will be fine. As always, I use Penzeys Spices.
I did not use all the salt in the marinade. I used about 1 teaspoon.
I used bottled lemon juice and left out the zest today. Sometimes I’m not in the mood to fiddle with real lemons. I used real garlic because I happened to have some, but the minced or chopped garlic in a jar would be perfectly good for this recipe.
DO use Greek plain yogurt. NO vanilla or anything other flavors!
If you don’t have time to put the chicken on skewers or if it is raining — or if you just don’t feel like grilling out — heat up some olive oil in a large skillet and brown the marinated chicken on medium high heat until the chicken is cooked through. If the marinade sticks to the skillet and begins to burn, add a little water or chicken broth to deglaze the pan. We did it this way tonight and it worked really well and tasted really great!
Image by Annie Mole, cooked meatballs via Flickr CC license.
This Make Ahead Meatballs recipe is originally from the 1999 Quick Cooking cookbook, but you can find it online now.
The magazine had a feature on getting more than one meal from an original item. For example there was an easy recipe for making Roasted Chickens (2) and then you could make chicken enchiladas with the extra chicken for another meal.
This meatball recipe made it into my “Family Favorites” notebook, though. My semi-picky eater daughter has always eaten these meatballs.
I cook pasta or tortellini and then heat up some sauce in a separate pot. People can combine it to please themselves. Meatballs on the side? Or on top of the sauce? Or with no sauce at all?
Here is the recipe with my tweaks. The original recipe is for 4 pounds of ground beef, but I very rarely make that many.
My recipe is for 1 pound of meat.
Combine in a large mixing bowl and stir together the following: 1 egg 1/2 c. fine breadcrumbs (chopped up dry toast is fine, but I often use packaged bread crumbs) 1/8 c. finely chopped onion (I use Penzey onion powder, about 1/2 t.) 3/4 t. salt 1 t. Worcestershire sauce (the original calls for 1/2 t., but I like more) 1/4 t. white pepper (black pepper is fine) 1 lb. 85% lean ground beef (or leaner if you prefer)
Using a scoop to make meatballs: Adventures of Pam and Frank, via Flickr CC license
Mix. Shape into small meatballs or use a scoop. Brown in a skillet with olive oil, turning until nicely browned and cooked through. Alternatively (and much easier if making more than a pound at a time), bake the meatballs on a tray in the oven at 400 degrees for 12-15 minutes, turning at least once.
A good way to make a lot of meatballs quickly is to flatten the meatball mixture out about 1 inch think into a square or rectangle on a clean surface. Using a knife, cut the meat into squares about 1 inch wide — cut 1″ strips in one direction and then cut 1″ perpendicular strips. Roll the squares quickly between your hands as you put them onto the baking tray so they look a little more meatball-ish. Bake as directed in the recipe. Done!
1JLS meatballs via Flickr CC license
Tweaks:
I often add some garlic, either to the meatball mixture or at least to the olive oil in the skillet. I sometimes add 1 t. or so of Italian Seasoning (Penzey, of course!). Chopped fresh parsley would be fabulous if you don’t happen to have a picky eater at your house who immediately turns up their nose at anything green. I do happen to use the white pepper for this recipe most of the time just because I have some, but it really isn’t a necessity. I think they taste best topped with some shredded Parmigiano cheese.
Oh — here are the partner recipes that were published with this meatball recipe:
vintage sign, image by The Tromp Queen CC license 4.0
I decided to change the name of The Heat is ON! to
The Tromp Queen COOKS!
In celebration of this change, I’m presenting several “old” recipe posts from my original “The Tromp Queen” in blog new posts here on The Tromp Queen COOKS! These are some of my very favorite recipes and I feel they deserve more visibility than they currently have (which is buried in a post entrancingly called “Recipe Re-visit”).
I hope you enjoy reading through these recipes and that you will try one or more of them. Please let me know what you think!
I tried to go back through to be sure all the old links will still work, etc. Please let me know if you come across any glitches with the new domain name.